1.8k
This example is the hello world of LCD examples, we display that text on the LCD in question. Connection is straightforward and you can see it at the top of the code, we use Port B
LCD_RS -> PORT B4
LCD_EN -> PORT B5
LCD_D4 -> PORT B0
LCD_D5 -> PORT B1
LCD_D6 -> PORT B2
LCD_D7 -> PORT B3
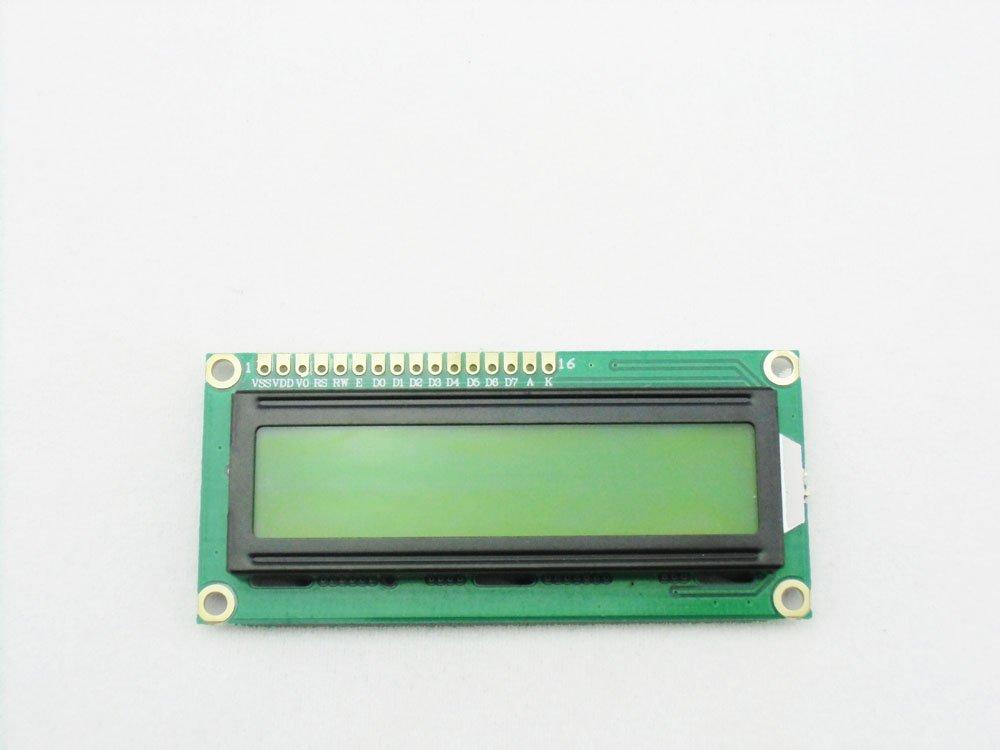
The LCD we used is similar to the one in the picture below, we connect this up and use it in 4 Bit mode, this saves on I/O pins.
| Pin No | Symbol | I/O | Description |
| 1 | Vss | – | Ground |
| 2 | Vcc | +5V | |
| 3 | Vee | Contrast Control | |
| 4 | RS | Input | Command/Data Register |
| 5 | R/W | Input | Read/Write Register |
| 6 | E | Input/Output | Enable |
| 7 | DB0 | Input/Output | Not Used in 4-Bit Mode |
| 8 | DB1 | Input/Output | Not Used in 4-Bit Mode |
| 9 | DB2 | Input/Output | Not Used in 4-Bit Mode |
| 10 | DB3 | Input/Output | Not Used in 4-Bit Mode |
| 11 | DB4 | Input/Output | Data Bus in 4-Bit Mode |
| 12 | DB5 | Input/Output | Data Bus in 4-Bit Mode |
| 13 | DB6 | Input/Output | Data Bus in 4-Bit Mode |
| 14 | DB7 | Input/Output | Data Bus in 4-Bit Mode |
| 15 | Vcc | – | For LCD Back Light |
| 16 | Vss | – | For LCD Back Light |
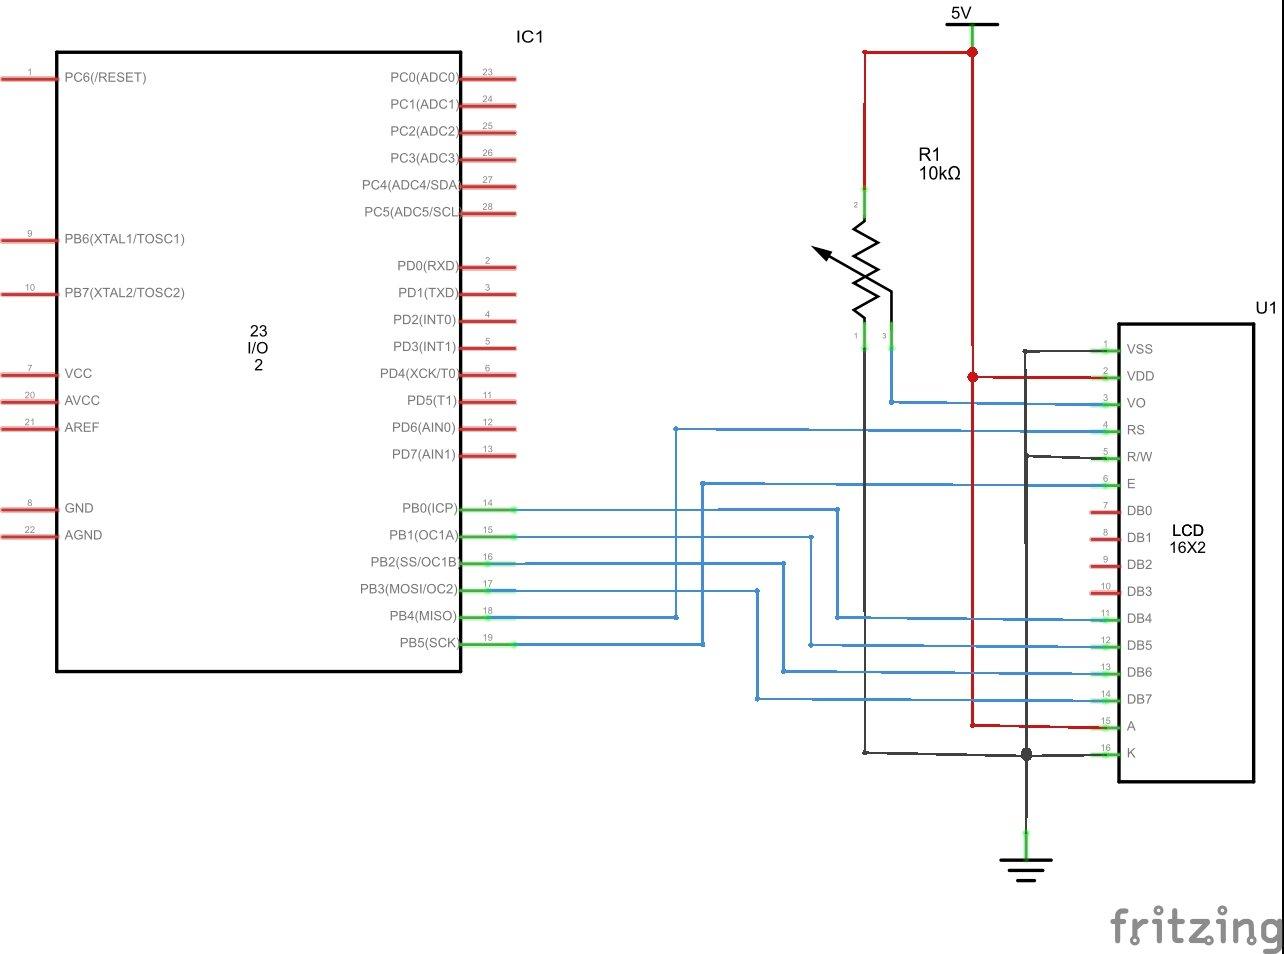
Schematic
Basic schematic showing LCD connections, assumption is you will already have power, reset and possible external clock circuitry as well
Code
Written in mikroC pro for AVR, this example uses the built in LCD libraries.
sbit LCD_RS at PORTB4_bit;
sbit LCD_EN at PORTB5_bit;
sbit LCD_D4 at PORTB0_bit;
sbit LCD_D5 at PORTB1_bit;
sbit LCD_D6 at PORTB2_bit;
sbit LCD_D7 at PORTB3_bit;

sbit LCD_RS_Direction at DDB4_bit;
sbit LCD_EN_Direction at DDB5_bit;
sbit LCD_D4_Direction at DDB0_bit;
sbit LCD_D5_Direction at DDB1_bit;
sbit LCD_D6_Direction at DDB2_bit;
sbit LCD_D7_Direction at DDB3_bit;

void main()
{

PORTB = 0;
Lcd_Init(); // Initialize LCD
Lcd_Cmd(_LCD_CLEAR); // Clear display
Lcd_Cmd(_LCD_CURSOR_OFF); // Cursor off
Lcd_Out(1,1,"Hello world"); //Write the word mikroC on the LCD
Delay_ms(300);
} // end main
Links
ATMEGA16/ATmega32 AVR Minimum System Board + USB ISP USBasp Programmer


